Video: Add and edit billing entities
Settings - Practice Management
Firm billing entities are useful for firms with multiple offices that require separate default invoice and statement templates. The default firm billing entity is identical to the firm details. This entity CANNOT be deleted. However, you can edit various fields, such as the firm's address and phone numbers.
Firms with a single firm billing entity will not see any changes, as the additional billing entity filters and labels are only displayed if there is more than one billing entity set up.
There are two stages to setting up billing in Practice Management, the billing entity and the general (global) settings. As you will see below, there are a range of billing settings available. You can select the ones that apply to you and leave the rest blank. You can enter default invoice text when you customize job types. There are various options for hiding or displaying the time and disbursements that have been added to the job. Once you have set up your default invoice options you can override these for individual invoices, if required.
- Click Settings > Practice Management.
- Click Billing Entities.
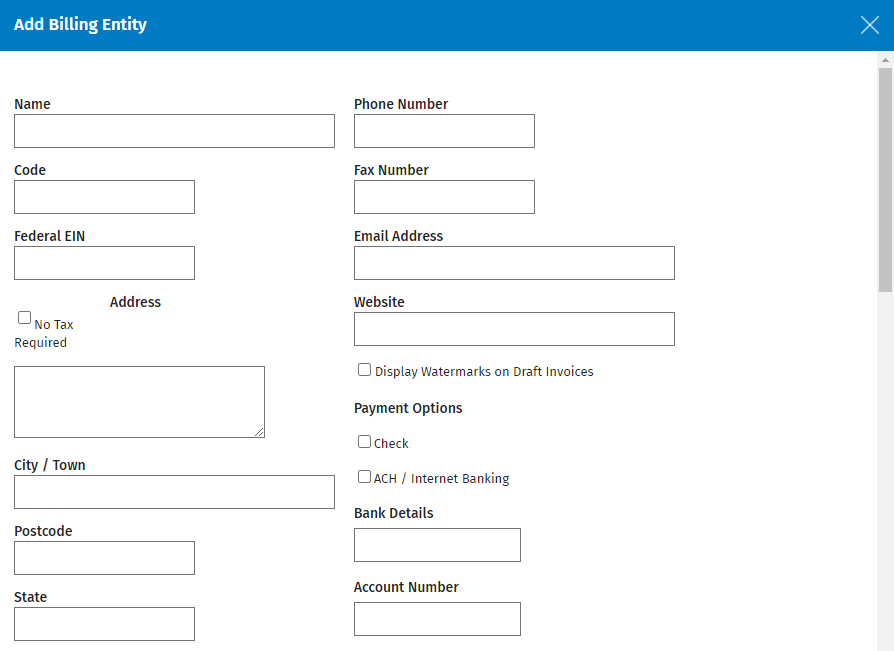
- Click Add Billing Entity.
- Type the entity's name, code, federal EIN number, and contact details. If the billing entity does not charge sales tax on invoices, select the No Tax required option. No tax will be applied on invoices, and will not appear on screen. You cannot change this setting if draft invoices exist for the billing entity.
- Select the Invoice Template for this entity - you can set up your own custom billing templates.
- Select the Invoice Email template for this entity, when sending emails to clients with links to invoices.
- Select the layout options for how WIP lines show WIP items, for Time, Disbursements and Adjustments.
- Select the Job Heading option, if you want to show job information by default, when WIP Lines are showing group or detailed views for time and disbursements.
- Type a number to use for the Next Invoice Number to be created for this billing entity. If you have multiple billing entities, they will have a default number set that differs a lot from the other entities. This is so each billing entity will have a sequential invoice number sequence.
- Select the Default Invoice Due Date type and type the required number of days.
- Type a default Invoice Message, for example, "Please pay within 7 days" - you can change the default message for a particular invoice or choose NOT to display it.
- Select the Credit Note Template for this entity - Supplied default invoice templates will work with credit notes.
- Select the Credit Note Email template for this entity, when sending emails to clients with links to credit notes.
- Select the Statement Template for this entity - the Statement Aged template shows 30, 60 and 60+ days aging of the debt.
- Select the Statement Email template for this entity, when sending emails to clients with links to statements.
- Select the Display Watermarks on Draft Invoices check box, if required.
- Select your payment options using the check boxes and type your firm's direct credit and/or credit card details, if applicable.
- Select the Receivables Notes Category from the list, if required.
- This activates the Receivable Notes tab in the Receivable Transactions page where you can view receivable related notes for the client.
- If you do not select a category, i.e. the setting is None, the Receivable Notes tab is not available in the Receivable Transactions page. You can view the notes via the client's Contacts record.
- The categories in the list come from the Note Categories in the Contacts settings.
- Click Save.

- Click Settings > Practice Management.
- Click Billing Entities.
- Click the Manage Billing Entity button for the Firm Billing Entity that you are setting up.
- Edit the details as required.
- Click Save.